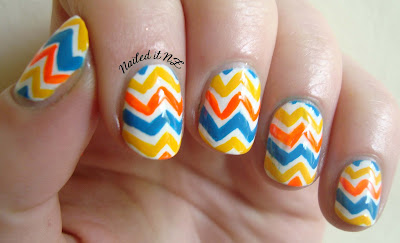
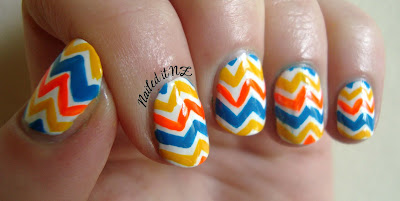
Hi everyone! I’m Jessie from Nailed it NZ, and Nicole and I are doing guest posts for each other today. I’m from New Zealand and started my blog about six months ago after realizing I was posting my nails on my personal facebook page a bit too much! I LOVE doing nail art; it’s turned into a big part of who I am. Anyway, today I’m going to show you my zig-zag nails and how to do them.
There’s a little story behind these nails – I recently broke a nail (I’m sure you guys will understand how COMPLETELY TRAUMATIZING this is!) and had to cut all my nails short. So now they’re tiny :/.
I decided, in the end, that this was a good opportunity to find some nail art designs that look good on short nails and so this month I’m focusing on doing lots of semi-easy tutorials that people with short nails can do. This is my third one, and I’d say it’s of medium hardness – those lines can be tricky!
I ended up only using Jordana nail polish for this manicure - I’m pretty keen this brand. It’s cheap ($5) and hasn’t got a few of the nasty chemicals in it that are in other cheap brands. The pop art polishes do get a bit gluggy over time but for the other ones stay fine for years. My favourite brands are OPI and China Glaze but as they’re between $20-$30 each here I tend to accumulate many more Jordanas!
A few tips that I couldn’t fit in the tutorial:
- Always use a base coat first. This might seem obvious, but I didn’t know it when I first started!
- When you apply your top coat, make sure you have a fair bit on the brush and do it in as fewer strokes as possible – this’ll discourage the design underneath from smudging.
- This (and any) nail art is best done at a table, with both arms/hands resting on something stable. It’ll stop the shaky hands (but so will practice).
- You don’t have to do every nail like this! The ring finger and thumb can look good with a design while the others only have one colour.
- If you’re finding it hard to stop your lines going wonky, don’t stress. Practice makes good – I’m not going to say perfect because mine sure aren’t! You can also switch to an easier design.
- Remember to clean up around your cuticles afterwards with a cotton tip and a little brush!
Just as I started writing this, I decided I wanted to put some glow-in-the-dark polish over the top – doesn’t it look cool??
Well that’s me, thanks for reading and if you haven’t already, come check out my blog at Nailed it NZ! Big thanks to Nicole for letting me guest post and don’t forget to check out her guest post on my blog!


WOW!! I loved these! I had seen them before but I had ab-so-lu-te-ly no idea how to do them! I will surely try to do them for the next challenge Inspired by a tutorial! :D
ReplyDeletethose are so gorgeous! :)
ReplyDeleteThis comment has been removed by the author.
ReplyDeleteThese are Amazing!
DeleteThe GITD effect is totally cool on this one - love it!!
ReplyDeleteYay, thanks everyone, glad you like them!
ReplyDeleteCute tutorial, and love those colors, especially with the glow in dark.
ReplyDeleteThe glow in the dark is super awesome!
ReplyDelete