Showing posts with label Stamping. Show all posts

Wednesday, April 24, 2013

P is for Purple and Patterned

Hiya polished friends!

Welcome to "P" day - lol, and of course I giggled because I'm a 10 year old boy in real life!!  Do we seriously only have 10 more letters left for Kimber's Lacquer Korner's ABC Challenge?  WOWza time flies by, hey?  What's our next challenge?  The New 31 Day Challenge??  All in favor?

Originally I was going to do a mani inspired by Heather over at Peace, Love and Polish, but it didn't turn out as I had hoped - I may or may not show it, we'll see.....Doesn't it suck when you have the best idea and it doesn't turn out!!  GRRRR....

Anyhoodle, I went on a bit of a polish binge this weekend and bought 22 polishes - eeks!!  I went to my local Shopper's Drug Mart and found NOPI's for $3.99, I grabbed a couple of those and a pink Essie for $1.99 - there was 3 - I bought them all...I don't feel guilty.  Plus our Walmart's finally got Salon Perfect and Pure ICE, so I stocked up - I actually went to two Walmarts to find what I needed - which was a lot apparently.


I used new plates that I got a while ago and haven't really used until now.  I bought the 2012 Cheeky Plates, you get 3 XL Jumbo plates for 14.99.  I mistakenly thought Jumbo meant they would fit on my nails, but see that purple moon there, ya that wasn't my intention - the plates don't fit my extremely long nails(okay, they aren't extremely long, but they're long for me!!).  I still love how they turned out so, yay for new nail stuff!!


Some of you asked which color I used for my O is for Oscar De La Renta Inspired mani and I don't want to disappoint so here's what I used:  Two coats of Sally Hansen Xtreme Wear in Mellow Yellow (thanks Gini) and then two coats of Sally Hansen Xtreme Wear in Sunny Side.  Sunny Side is super sheer and I couldn't get coverage even with multiple coats, so I used both.

Be sure to join me in checking out my fellow challengers and their "P" mani - giggle!!

Holla, N


Friday, April 19, 2013

Stamping Princess Part Duex

Happy Friday my lovely readers!!  I hope you're week went by without a hitch and that you're ready for the weekend!  Today I have a review of Born Pretty Store stamping plate, the one I used for my artsy 3-D nails, seen here.  I picked this stamping plate for the image I'm showing you in this post.  I love the shape and the swirly prettiness.  Disclosure:  this product was given to me to review, all opinions are my own and are in no way shape or form influenced by anyone else.

First up, I would again, like to apologize to Daisy from the Born Pretty Store, for the lateness of this review. I did receive this product quite some time ago and am now just getting to reviewing it.  As always with the Born Pretty Store, I'm so impressed with their shipping, not only is it free, but it gets here incredibly fast considering it's coming from so far away.  Disclosure:  this product was given to me to review, all opinions are my own and are in no way shape or form influenced by anyone else.


For this mani, I used the Born Pretty Store black stamping polish that can be purchased individually or as a set of 5, which is the one I got.  The set includes red, yellow, blue, black and white and retails for $6.93 (or you can get them individually for $2.05).  The stamping plate (plate number QA48) is one of the Born Pretty Store's own creations, as I said above, I choose this plate for the image I used here, but I do really love the Snow White image that also is included on this plate - both a larger version and a smaller one as seen below.  Disclosure:  this product was given to me to review, all opinions are my own and are in no way shape or form influenced by anyone else. 
Born Pretty Store covers their plates in blue plastic film, so there's no way you'll forget to take it off.  The plate itself is a little sharp around the edges, so I recommend handling it carefully.  As for the designs themselves, they're well engraved and sized appropriately.  I didn't have any problems picking up the image on my trusty stamper and as you can see, I'm not the best at lining the stamps up but the image is abstract enough that it doesn't really matter.  Disclosure:  this product was given to me to review, all opinions are my own and are in no way shape or form influenced by anyone else.


If you're interested in picking up this plate, you can purchase them here or search the Born Pretty Store for item ID:  4861.  The great thing about Born Pretty Store stamping plates are, that they are reasonably priced, this one retails for $2.99 and there's also great selection.  Want to get this for yourself, here's a coupon code for 10% off your order - bonus!!  Disclosure:  this product was given to me to review, all opinions are my own and are in no way shape or form influenced by anyone else.


Holla, N

Monday, April 8, 2013

Stamping Princess

Happy Monday all!  Today, I have a long overdue review of Born Pretty Store stamping polishes I received.  I want to apologize to Daisy from the Born Pretty Store for the lateness of this review, I'm feeling really bad for letting this sit for so long.  I have a bit of the blogger blues, while I love to paint my nails, I find having something interesting to say hard to do.  I'm not ready to give it up yet, maybe I'll do a giveaway or something to get out there more - hmmmm.

Back to the purpose of this post.  I received some Born Pretty Store stamping polishes a while back, as I've said before, I'm pretty impressed with the shipping from BPS, it's free and gets here quickly, something we nail mail lovers appreciate!  The stamping polishes can be purchased individually or as a set of 5, which is the one I got.  The set includes red, yellow, blue, black and white and retails for $6.93 (or you can get them individually for $2.05).  Disclosure:  this product was given to me to review, all opinions are my own and are in no way shape or form influenced by anyone else.


I realize that's a little messy and it didn't really turn out how I wanted, but I wanted to show you how the stamping polish shows up on a variety of different backgrounds.  My least favorite of the bunch was the yellow, it worked okay on white, but on the other colors you couldn't see it very well - you can see a little poking out on the blue and you can see it wasn't very opaque.  The red and blue fared better, the blue was opaque enough but the consistency was thinner than the red, white and black.  Disclosure:  this product was given to me to review, all opinions are my own and are in no way shape or form influenced by anyone else.


I like the white and black the best, the consistency is thick and goes on great.  I will show you the black stamping polish in an upcoming review.  I'm not the best stamper in the world as you can see, but after doing this I really loved how my pointer finger turned out so I decided to try something a little different.  Whip out your 3-D glasses and check this out.  Disclosure:  this product was given to me to review, all opinions are my own and are in no way shape or form influenced by anyone else.


I really love how this turned out and it totally came out as I envisioned it.  Anyone with 3-D glasses out there?  Can you tell me if it actually works??

If you're interested in picking up some of these polishes, you can purchase them here or search the Born Pretty Store for item ID:  1323.  Here's a coupon code for 10% off your order - bonus!!  Disclosure:  this product was given to me to review, all opinions are my own and are in no way shape or form influenced by anyone else.


One last shot of my snow white 3-D nails!  Disclosure:  this product was given to me to review, all opinions are my own and are in no way shape or form influenced by anyone else.


Holla, N

Monday, March 18, 2013

M•A•S•H Stamped Review


Happy Monday, polished friends!!  Today I have the first of a couple of reviews of M•A•S•H products I've received.

First up is the M•A•S•H Nail Art Polish for Stamping in White.  I'm always on the look out for great stamping polish, I know you can use regular polish, but I always seem to get crap results.  I'm way too cheap for the stamping polish of the well known brand, that I won't mention, but starts with a K, so finding another alternative, is a major score for me!  I have heard a lot about M•A•S•H since my foray into the nail blogging world, but I always thought they just did stamping plates.  I'm pleased to see that they offer so much more than that, from stamping polish, nail stickers, accessories and rhinestones.

MASH White Stamping Polish White on White

I wanted to do something delicate and pretty and really loved my white on white polka dots I did when I first started this whole blogging thing. I wish I could say that I used a M•A•S•H stamping plate, but I don't own any....I know it seems weird that I'm reviewing a M•A•S•H stamping polish with un-M•A•S•H plates, but such is life - plus, the important bit is the polish!!  First off, it comes in a 15mL bottle, the only "stamping" polish I own, comes in a little itty bitty bottle that doesn't last long and gunks up super fast, so a bigger bottle is a total score.  Secondly, this stuff didn't dry super duper fast, once you pull your scraper over the image, and you happen to drop your stamper on the floor (like I always manage to do), you actually have a second to pick it up and still get a clear image onto your nail.


Because the formula is a little thinner than my other stamping polish, I wanted to test it on a darker background.  My nails were already nicely done, so I pulled out my tax package and stamped on the pretty green cover!  There are some bare spots, but I attribute that to my poor stamping skills, rather than the product.

MASH White Stamping Polish White on White


You can purchase this stamping polish and other M•A•S•H nail products on their website www.mashnails.com, the stamping polish retails for $5.99 a bottle, which I think is a pretty good deal for a 15mL bottle!

Want to be apart of the M•A•S•H community, follow them by clicking the links below!

Facebook
Twitter
Pinterest
YouTube
Google+

Holla, N

Monday, January 28, 2013

Monday Review

Hiya!  Today I have a review of Born Pretty Store's silver square studs.  I love love love studs - the nail accessory, not the man variety, okay I like the man variety just as much.  Justin Timberlake is my weakness, his voice - dreamy, his bod.....oh wow, his bod - to die for!

Now that I've cleaned the drool off my face, let's get back to business!  Studs are everywhere these days, I picked up some of the sticker variety a while back and used it for my Tell me About it, Stud mani.  I loved the simplicity of what I did with them, but you only get a few in a pack and I wanted to try out some designs using more than one.  The package you get from the Born Pretty Store comes with about 100 individual studs (likely more, I've never been good with guess how many jellybeans are in the jar games!).  They come in a resealable clear baggie so they are easy to get at and easy to store.

Application was a little difficult for me because I don't own any inexpensive top coat - I'm a loyal Seche Vite user (yes, despite the shrinkage).  I think if you used a coat of inexpensive top coat to stick the studs on, it would work out way better.  I used nail glue - it totally worked, but you can see the line of glue I applied even though I applied a generous coat of Seche.

This design was inspired by Nicole at Polish Me, Please first attempt at a studded manicure.  Nicole is the QUEEN of stamping and her mani's always inspire me to break out the ol' Bundle Monster plates - which she recommended I buy!!  Check out the inspiration here.  If you're not following Nicole, DOOOO it, she is fabulously creative with her stamps and is also the sweetest nail blogger out there - she was the first person to comment on my blog AND follow me on Twitter!!

Born Pretty Store Square Stud Nails


Light Blue with Silver Stamping Nails
Just to show Nicole my stamping skills - I still need some practice, but I'm glad I managed to get the stamp on the  whole nail!
If you're interested in picking up some studs of your own (unfortunately no man varieties for sale yet!), visit the Born Pretty Store and look up Item ID: 2859 or click here.  You get the whole package for $5.73 - total steal!!  Plus, here's a 10% off coupon code - major score!!


Tune in Friday for my review of the Born Pretty Store black flocking powder - super excited to share this mani, so don't forget to stop on by!

Holla, N

Wednesday, January 9, 2013

A is for Acrylic Awesomeness

Hiya!  Welcome to day one of the ABC Challenge, hosted by ma girl Kimber over at Kimber's Lacquer Korner!!  So excited to be joining some of the same ladies who did the 31 Day Challenge and meeting new blogger buddies for this amazingly awesome challenge - see what I did there - threw in some extra A's for "A" day!

I did this mani before I knew about the challenge and I didn't have time to find a polish that starts with an "A" so I choose to spotlight the acrylic paint I used.  I love using acrylic paint for nail art, you can mix colors easily and literally make hundreds of different colors and shades using only a handful of colors.  Plus it's super cheap, you can pick it at the dollar store and the selection is fabulous.  Acrylic paint dries matte, so a good top coat is a must-have, but for this mani, I mattified the base so I didn't need a further top coat - bonus!  This also reminds me a little of art deco - another "A"!!!

Art Deco Nail Art

Art Deco Nail Art


Please join me in checking out the other ladies doing this challenge by clicking on the links below!

Holla, N

Kimber @ Kimber'sLacquerKorner
Gini @ Sassy Paints
Kat @ Hooked On Polish
Lisa @ Lozlosa
Diana @ Nails By Diana
Nicole @ Nicole Gets Nailed
Nailista
Lariesa @ Me, Myself, and Polish
Patty @ Patty And Goldie's Day Off
Meredith@ Perfectly Polished
Joanna @ Sweet Polish of Mine
Sammi @ GlitzNGlammer
RiaG @ Polishaholic
Dionne @ Glittery Fingers
Aly @ Wonderland Beauty
Kate @ Painted Pony Nails
Sarah @ Faithfully Polished
Small Budget Beauty
Brittany @ Pretty, Pink, and Chic
Alaina @ Dont Spill The Acetone

Simona @ Light Your Nails
Elle @ Miss Nail Polish 

Monday, January 7, 2013

Nicole's Nubbins

Happy 2013 polished peeps!!  I hope everyone had a wonderful holiday season and a fabulous New Years!  I've had a very relaxing two weeks off, it's officially over today - sad face.  Back to earning a living - ugh.

I've been having so much trouble growing my nails lately, I've considered changing the name of my blog to Nicole's Nubbins - full disclosure and all that!!  After taking off this mani, I had a break of my already short nails, so I had to chop them all off again - argh, so frustrating  especially after having such a successful summer of long beautiful nails!  I've even considered getting acrylics, but I want my natural nails to be healthy, and acrylics tend to do a number on your natural nails, so I'm staying away from those for now.  I want stiletto nails so badly, I love the look, but it's not happening here anytime soon!

Black White Gold Stamping Nail Art

Black White Gold Stamping Nail Art

I'm on a roll with trying to improve my stamping skills, plus I've been having major challenge withdrawals, so I haven't been all that inspired to do major nail art.  If you know of any challenges, let me know, I'm so down for the get down.  Kimber from Kimber's Lacquer Corner is hosting the ABC challenge shortly and I'll be doing that, but it's only a once a week deal and I'm committing to posting Monday, Wednesday and Friday, so I need to fill up two more days!

Black White Gold Stamping Nail Art

Black White Gold Stamping Nail Art

Have a wonderful Monday!!

Holla, N

Thursday, December 13, 2012

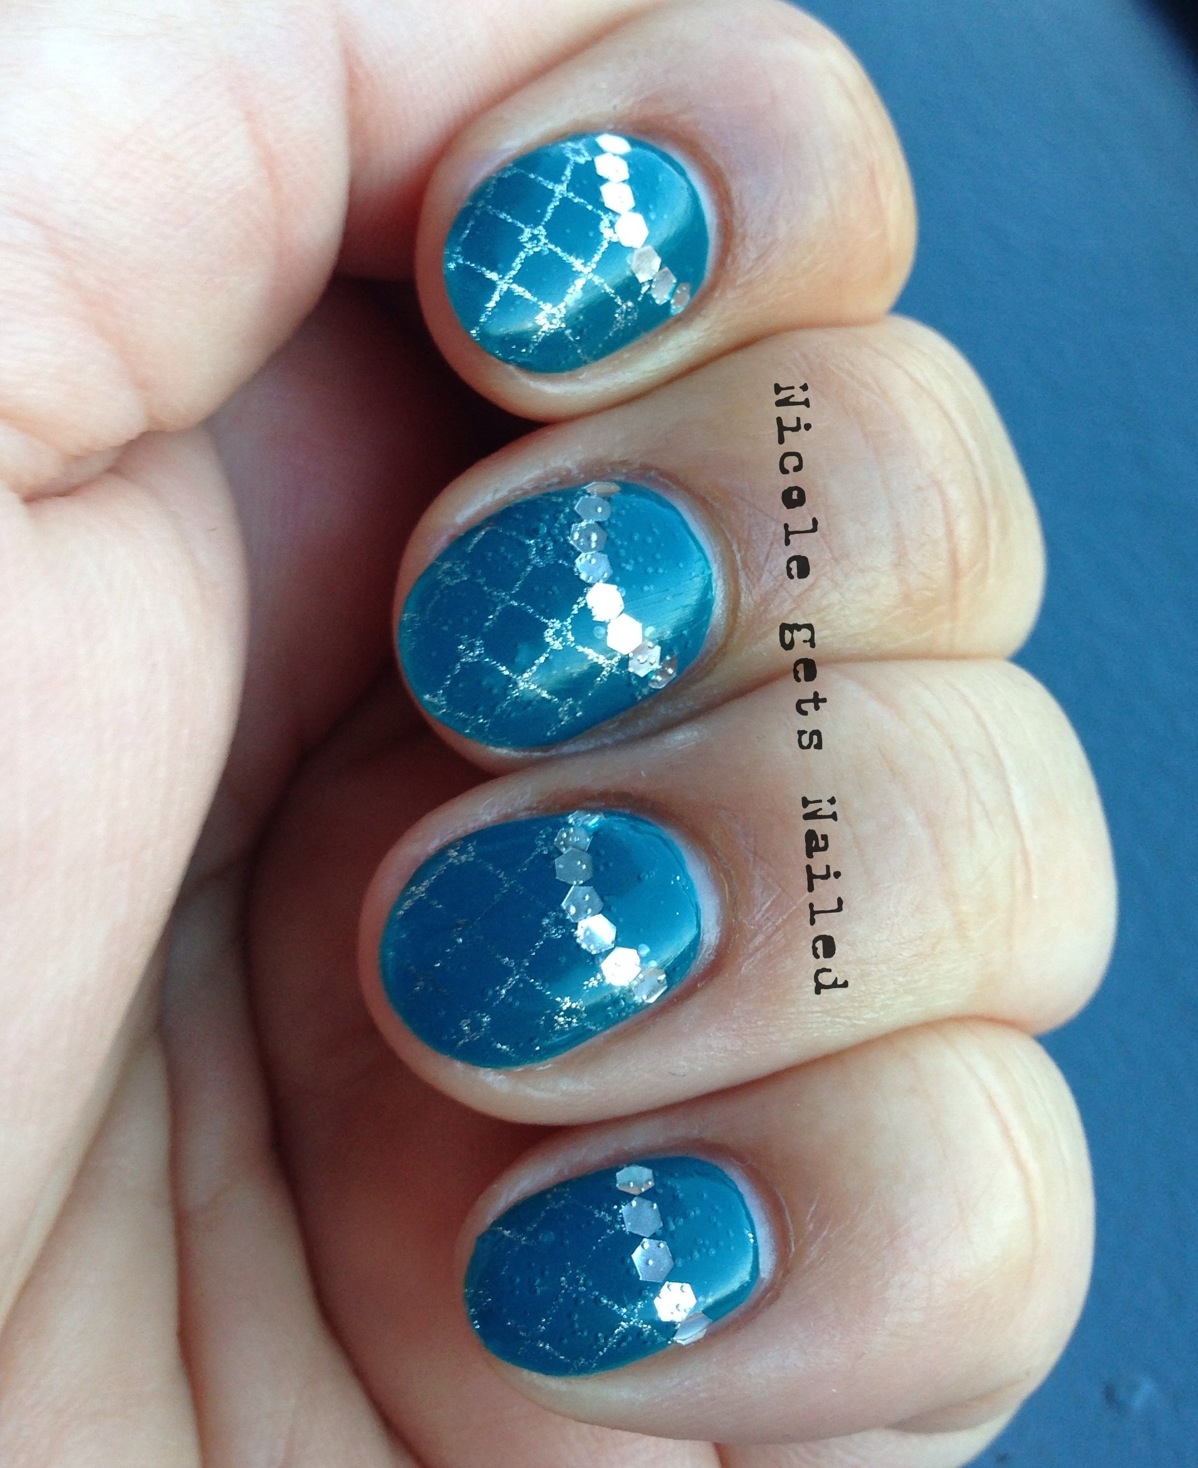
Teal You What

Hello polished pals!!  I feel like I've been slacking on the blogging lately, for some reason I'm having a bit of bloggers block.  I haven't given up doing my nails, and I don't view blogging as work (yet, thankfully), I'm just so focused on other things!  Not that I actually have to do anything for those other things, it's just that they're there.  Plus, because I've dropped all my challenges, I don't have that timeline to get posts up by a certain time.  When I first started blogging, I was doing it everyday and then had to keep up with challenges, so I was posting mostly everyday.  Now that I have no schedule to keep, it's been hard for me to stick to regular posts.  I think I'll try for Monday, Wednesday and Friday starting next week, that seems reasonable to me - agree?

Teal with Silver Stamp and Glequins

Teal with Silver Stamp and Glequins


I'm not a huge fan of this mani, I wish I had used gold instead of silver, but I don't have any gold glequins, so I settled on silver.  I love this teal, but it stains so bad, there's no room to get this on your cuticles or you'll have it there for a while.

Holla, N

Friday, December 7, 2012

Stamped Ring

Hello Polished Pals!!  I'm here, I'm here!!  I'm feeling so guilty for leaving you all for the last couple of days.  I've missed two 12 Days of Christmas posts (or one, I can't even remember...) and I had the same mani on for two whole days - who does that - lol!!

It's been a hectic couple of days - I bought my very first brand new car on the weekend and finally got it on Tuesday night.  It's sooooo nice, no more grinding noises when I turn left or right!!  The hubby was very concerned the car would break down and cause an accident, so I think I replaced it just in time!!  Our 7 year anniversary was yesterday and the hubby surprised me with my engagement ring all fixed and fitted.  Long story short, had to take it off because of eczema, when I put it on again, it no longer fit - it got stuck, I had to go to Emerg to have it cut off and it's been broken ever since (about 4 years).  I totally cried like a baby and it felt like he had proposed all over again, it was super sweet!  Something to know about the hubby, is that he is the absolute WORST at keeping secrets or surprising me, so he totally hit the ball out of the park this year with this gift, I had NO idea.  He got me again when we went to pick up the new car, he had gone there earlier in the day and got them to put my brand spankin new laptop in the trunk so when the sales guy opened the trunk, it was there - I was totally surprised!!  No easy feat, but he did it twice in one week.  I'm super duper lucky, he's pretty much the greatest man ever!


Here's my beautiful ring, so pretty....

Blue with White Stamped Nails
Here's the mani I wore for two days, at least it was pretty!!

Base Coat:  Orly Bonder
Main Color:  Orly - Shockwave
I used the special Born Pretty Store white stamping polish for the stamps
Top Coat:  Seche Vite

I think I'm going to have to bow out of the 12 Days of Christmas challenge, I will still be checking out all the lovely mani's, but I think I might have challenged myself out.....

Holla, N


Wednesday, November 28, 2012

Skull-rific!

Happy Hump Day!!  This week has been going by so slowly, I think it's because I was off on Monday and I usually take days off on Friday, so my weeks all messed up!  Will Friday ever come?

I've got a long overdue review of some cute skull water decals I received from KKCenterhk for review.  You may remember from my EPIC 100 Follower Giveaway, that KKCenterhk was kind enough to provide some cool stuff for my giveaway - the alphabet stamping set, won by Becca from Nail Narcotics and the cute gold peacock water decals, won by Maggy from the Daily Lacquer.  Becca did this fabulous mani, dedicated to her favorite nail artist - moi, lol, you can take a peek, here.

Anyhoodle, onto the review - I picked the Rock Skull Water Decals, because they are so darn cute.  I was a little intimidated to use these, one, because they are so cute, I didn't think I could do them justice and two, because I was worried they would be SUPER difficult to apply.  Totally not the case - I have to say, I'm super surprised at how easy these were to use.  All you do is cut out the decal you want to use, soak it in a bit of water and carefully slide the decal from the paper.  You have to make sure your nail is dry and not super soaked like I did on my first try.  The decal won't stay on a wet nail so I had to take it off and make sure my nail was dry.   I just held the decal in my other hand and dried off my nail, super easy.  Once it was dry, I placed the decal and fiddled a bit to get rid of wrinkles and VOILA!  I didn't use tweezers and I don't think I would when I use these again.  I think these are sturdy enough if you are gentle to withstand the handling.

Skull Water Decals Nails

Skull Water Decals Nails

Skull Water Decals Nails

Apparently I was in the mood to try every technique on my nails last night, water decals, gradient, stamping, leopard, polka dots and glitter - it's a little much, but how CUTE is that decal?  There's 25 nail decals in a set and they're super reasonable, at only $2.82 USD.  If you're interested in getting some of these babies for yourself visit http://www.kkcenterhk.com/ and search "skull water" or just click here, the item # is WDSY558.  Want something a little more serious, how about trying the gold peacock water decals, you can find them here.  Is stamping more your style?  You can pick up the alphabet here and here.

Thankfully, I've done this post in time for you guys to use my 10% off coupon to get your own goodies from KKCentrehk, the coupon code is:  nearlynailed and expires Jan 31, 2013!! 

Holla, N

Monday, November 5, 2012

Grading the Neon

Hiya!  Another weekend bites the dust - welcome Monday.....It's a short week for me and then I'm off for a week - woot woot!!

Day 2 for The Lazy 15 challenge is gradient - not my favorite technique, but I decided to give it a go with my lovely neons!!  I'm continuously defying the rain by painting my nails in super duper bright neons - it's not really working, but it does make me smile!!

Neon Yellow and White Gradient

Neon Yellow and White Gradient

Can you see that I tried to do some white stamping over the gradient?!  Yah, me neither, so I pulled out the black stamping polish!

Neon Yellow White Gradient with Black Stamping

Neon Yellow White Gradient with Black Stamping

White:  Finger Paints - Papier Mache
Neon Yellow - Nina Ultra Pro - Solar Flare
Top Coat: Seche Vite

Show some love to the other gradients by clicking on the links below.  Check back Wednesday for Dots - my fave!!

Holla, N


Tuesday, October 23, 2012

Flashback!

Hiya folks!!  I'm on the mend from my cold, still feeling stuffy, but I went to work today, so all is good!  I'm pulling this mani from the vault, even though I should be posting some Nail-aween challenge mani's - I'm having brain block on something creative to do for spiders - any suggestions?!?!

Neon Orange and Pink Gradient

Neon Orange and Pink Gradient

Neon Orange and Pink Gradient

Neon Orange and Pink Gradient

This is a recycled mani - I wore the gradient first and then decided to stamp it when I got home and I think I mattified it - it looks mattified, don't you think?  This was also when my nails were so pretty and long - I miss them!!

Base Coat:  Orly Bonder
Gradient:  Finger Paints - Pink Perspective and I think Tangerine Tint
For the stamp, I used Sally Hansen Insta Dry - Quick Canary

Have you entered my giveaway?  The countdown is on, a little over a week to enter!!

Holla, N

Sunday, September 16, 2012

Makin' the Grade-ient!

Hiya Polish Peeps!!  Today is gradient day for the 31 Day Challenge....  I have to be honest, I suck at gradients.  I swear, I've tried every method and can't seem to "get" any of them.  I ended up doing this twice,  my first attempt was a MAJOR disasticure, I tried to make it better and ended up making it worse.  Up first, is the one I ended up liking....

Nude and Green Gradient Stamped Gold

Nude and Green Gradient Stamped Gold

Feast your eyes on these puppies....

Nude and Pink Gradient with Polka Dots

I should have left well enough alone and not added the polka dots, but then I decided to add more polka dots - total FAIL!

Nude and Pink Gradient with Polka Dots

Base Color:  Color Club - No Name
Gradient:  L'oreal - Club Prive
I used BM stamp for the gold and used Sally Hansen - Golden-I
Top Coat:  Seche Vite

For the disasticure, I used the same color club for the main color and dots and used Wet n Wild - Violet Creme for the gradient.

Don't forget to check out the other lovelies doing the 31 Day Challenge by clicking on the links below!!

Holla, N

-Kimber at Kimber's Lacquer Korner
-Kat at Hooked On Polish
-Diana at Nails By Diana
-Aly at Wonderland Beauty
-Meredith at Perfectly Polished
-Nicole at The Color Republic
-Kate at The Painted Pony Nails
-Cee at Absolutely Cee
-Sam at Polished Art
-Nail Narcotics
-Nicole at Nicole Gets Nailed
-Shelby at Shelby's Swatches
-Stephanie Louise at All Things Beautiful 
-Mixed Mama
-Joanna @ Sweet Polish of Mine
-Patty Greenberg
-Liz and Lisa @ Lozlosa 
-Mari at Nailista
 -Greta at How Was Your Day?
-Miss L at Beauty by Miss L 
-Gini at Sassy Paints
-Chameleon Stampede 
-Pam at Nail-E-Glance
-Me, Myself, and Polish
-Robin Sparkles 

Thursday, September 6, 2012

Favorite Heart/Love?

Hiya everybody!  Day 8 of My Favorite Things Challenge - Hearts and/or Love!

I have to admit that I'm not the best at drawing hearts - well, hearts on my nails to be more accurate.  On my last trip to Sally's I picked up some Finger Paints in what looks like a really pretty neon pink, it doesn't register well in photos or in real life.  It's more of an orange-y pink than a pink-y pink.  Regardless, this was amazing to apply, no white base coat needed - sweet!!  I still like this color, but I'm trying to find a neon pink that is more like my Barielle Pink Fury, which is the worst formula ever, but the prettiest color!! Any suggestions??

Neon Pink Green Black White Hearts Skull


Neon Pink Green Black White Hearts Skull


Neon Pink Green Black White Hearts Skull

Ugh, just realized how jacked up my cuticles are looking - that's what you get when you do four mani's in two days.

Base Coat:  Orly Bonder
Main Color and Hearts:  Finger Paints - Pink Perspective, NYC - French White Tip, Essie - Licorice
I used Vernis - Neon Green for the stamped image on my ring finger and the bow for the skull.
Top Coat:  Seche Vite

Don't forget to check out the other lovely ladies participating in My Favorite Things Challenge by clicking the links below.  Check back on Tuesday for FLOWERS!!

Holla, N

Tuesday, July 24, 2012

Stampeedo

Stamping?!  Eeeeks

I've seen so many cute manis using the 2012 Bundle Monster plates I absolutely had to have them.  I probably should have practiced with my Salon Express stamping set a little more before purchasing the new bundle monster plates, but I have no patience!!  I dabbled a little with the SE stamping set as seen in Pinkin' it Up, I had a little issue with streaking and the designs are pretty boring.  My new buddy, Nicole from Polish me Please, who is the QUEEN OF STAMPING suggested the BM plates.  I hummed and hawed about getting them because I'm cheap and I hadn't mastered the SE plates, but Nicole's mani's convinced me - are you still here looking at my blog?!?!  GO there immediately, here's the link again (Polish me Please), she is amazing!!  Back?  Okay, scroll down to see the train wreck or as Nicole calls it the disasticure!

Salmon Pink Bundle Monster Stamping Plates

Salmon Pink Bundle Monster Stamping Plates

Here's my practice run on yesterday's mani - I was all "this is easy" - HA.  It's so hard to get the design straight, which I'm hoping will come with more practice!

Pink Hibiscus Bundle Monster Stamping Plates

For today's mani I used:

Base Coat:  Orly Bonder
Base Color:  Nyx - Salsa
Stamped Color:  Sally Hansen Insta Dry - Quick Sand
Top Coat:  Pro FX Quick Dry High Gloss Top Coat
Stamp:  2012 Bundle Monster - BM-314

For the polish I used on yesterday's mani, click here.

Holla, N